MAME Cabinet and Design
Guest written by Chris

Funspot, Laconia, NH
Before we really even started the renovation of our kitchen, we decided we would probably need an easy project we could do afterwards to adjust back to normality.
I think we were discussing a video game cabinet actually the first weekend of initial demo on the kitchen, since we were at Funspot for the day, and we had been talking about certain design choices for our breakfast area which ultimately never came to fruition. For instance we talked a lot about having that area decorated in kind of an '80s pizza place/diner car style, and what do you want at your pizza place? You want arcade games.
So we kind of bought a couple of parts here and there during the kitchen project to get ready for our little game cabinet after-project. We chose a spot where the cabinet could go, and had the electricians run HDMI from there to the spot we planned our table would go. That way we could play random music videos or whatever, and have them output on a screen at the table.
None of this happened. Then, suddenly, the kitchen was complete, and the "pizza place" motif for the breakfast spot had gone over the shoulder quite a ways back.
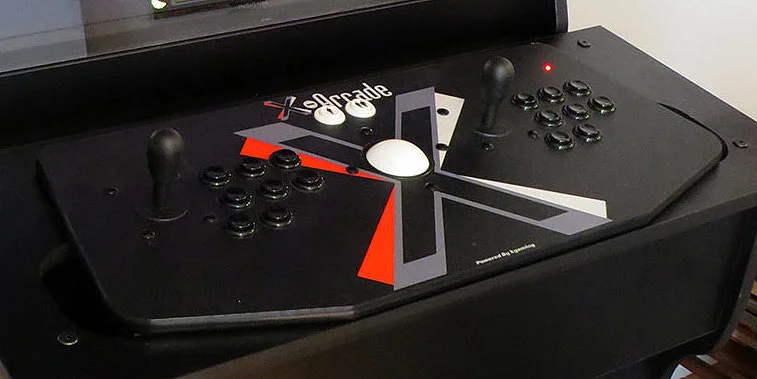
The X-Arcade Tankstick
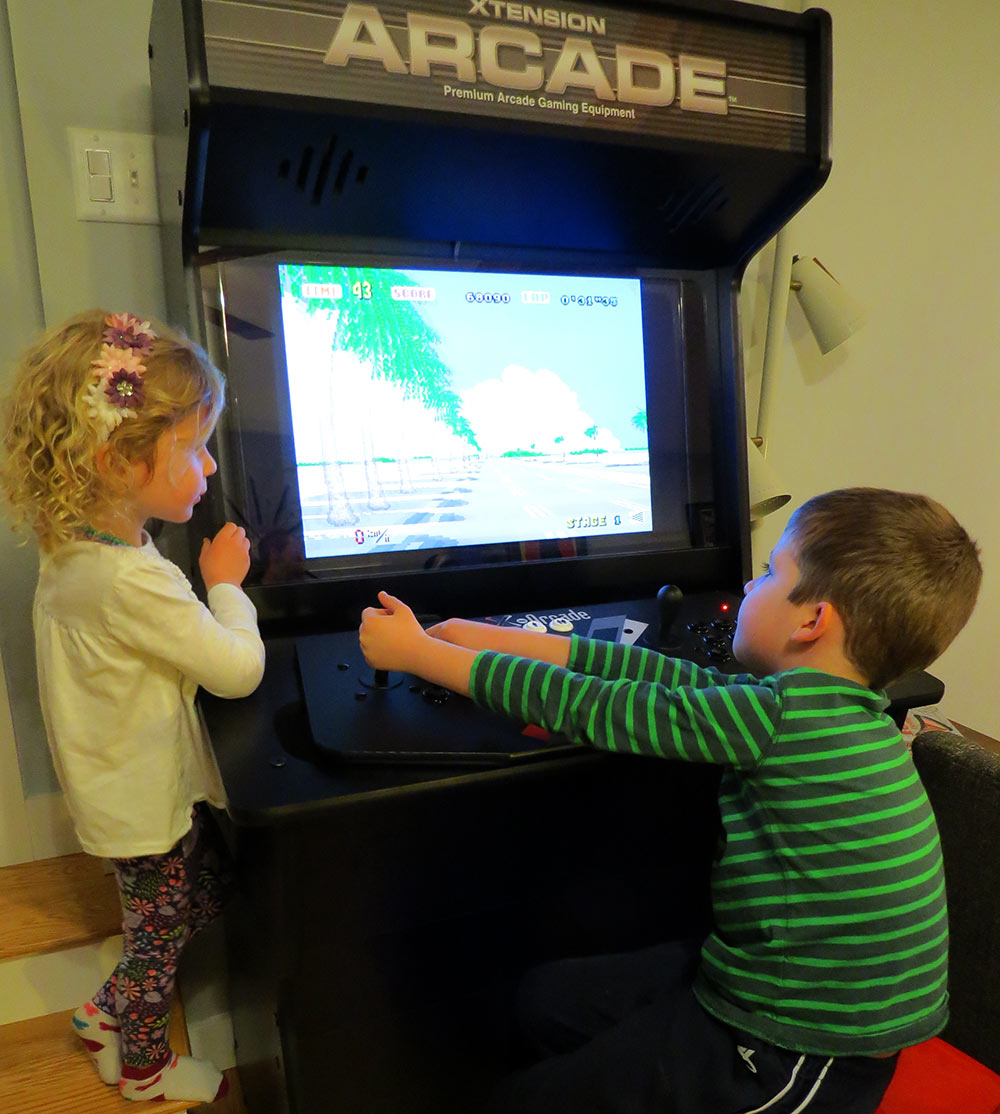
But we did already have the X-Arcade Tankstick and a 30" TV ready to go. I had also gotten a Raspberry Pi 3 set up and we'd been testing out various games on it. The Pi 3 plays most of the arcade games I care about, and also does a good job with 8-bit and 16-bit consoles and 16-bit (Atari ST / Amiga) computer emulation. Using RetroPie with Emulation Station provides a simple and intuitive interface as well. I chose the 30" LCD because it would give you a decent amount of space for vertically oriented games like Centipede and Donkey Kong and such.
We decided the actual logical place for this cabinet would really be our living room, which is also pretty distinctly mid-century and pre-arcade. When we came to actually think about the cabinet, we kind of sketched or talked over a few designs. Do we get really wacky with it and make like a Jetsons-looking kind of retro-futuristic thing with a kidney shaped bezel for the TV? Do we try to make it with wood paneling to match with the '60s-ness of our room?
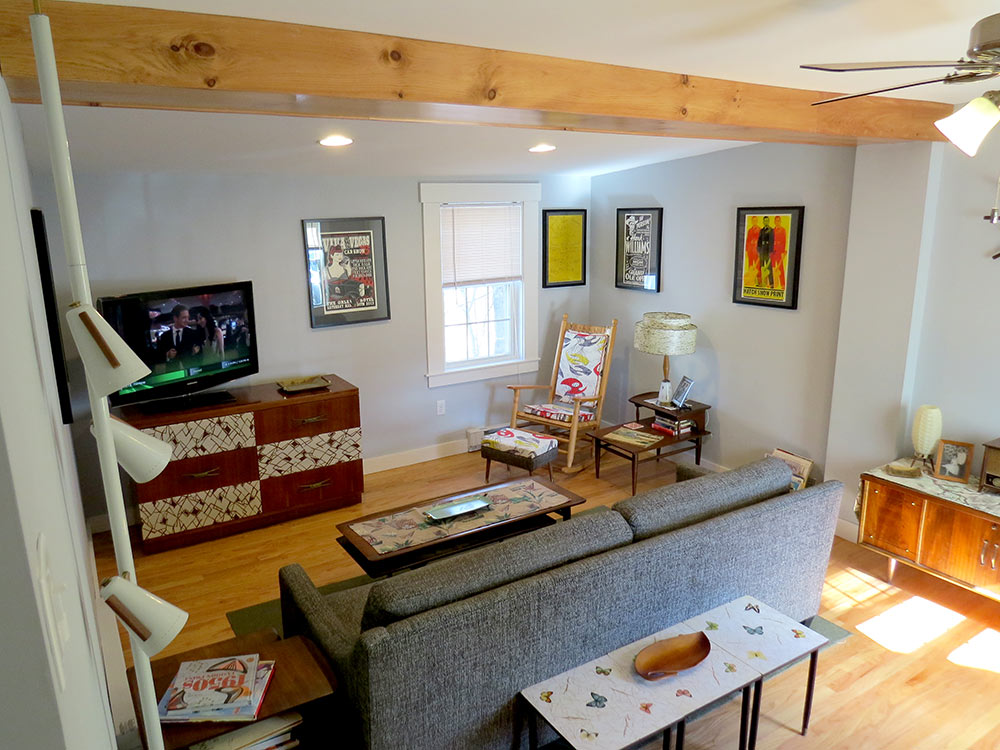
Our Mid-century styled living room

Computer Space, 1971 at Funspot. A cabinet design like this would have blended perfectly in the room, but may have been slightly outside of our building abilities.
At the end of the day, the logical answer was that while we could design and build this thing ourselves pretty easily with like sheets of melamine countertop and a jigsaw, the logical thing to do is get a kit in which someone else had already answered all the questions of "how to mount the TV", and "what should we do about the keyboard and whatever". This would allow us to just work on the artistic design piece knowing the hardware stuff was a solved problem.
So we got a cabinet from Rec Room Masters, and it's pretty pimp.
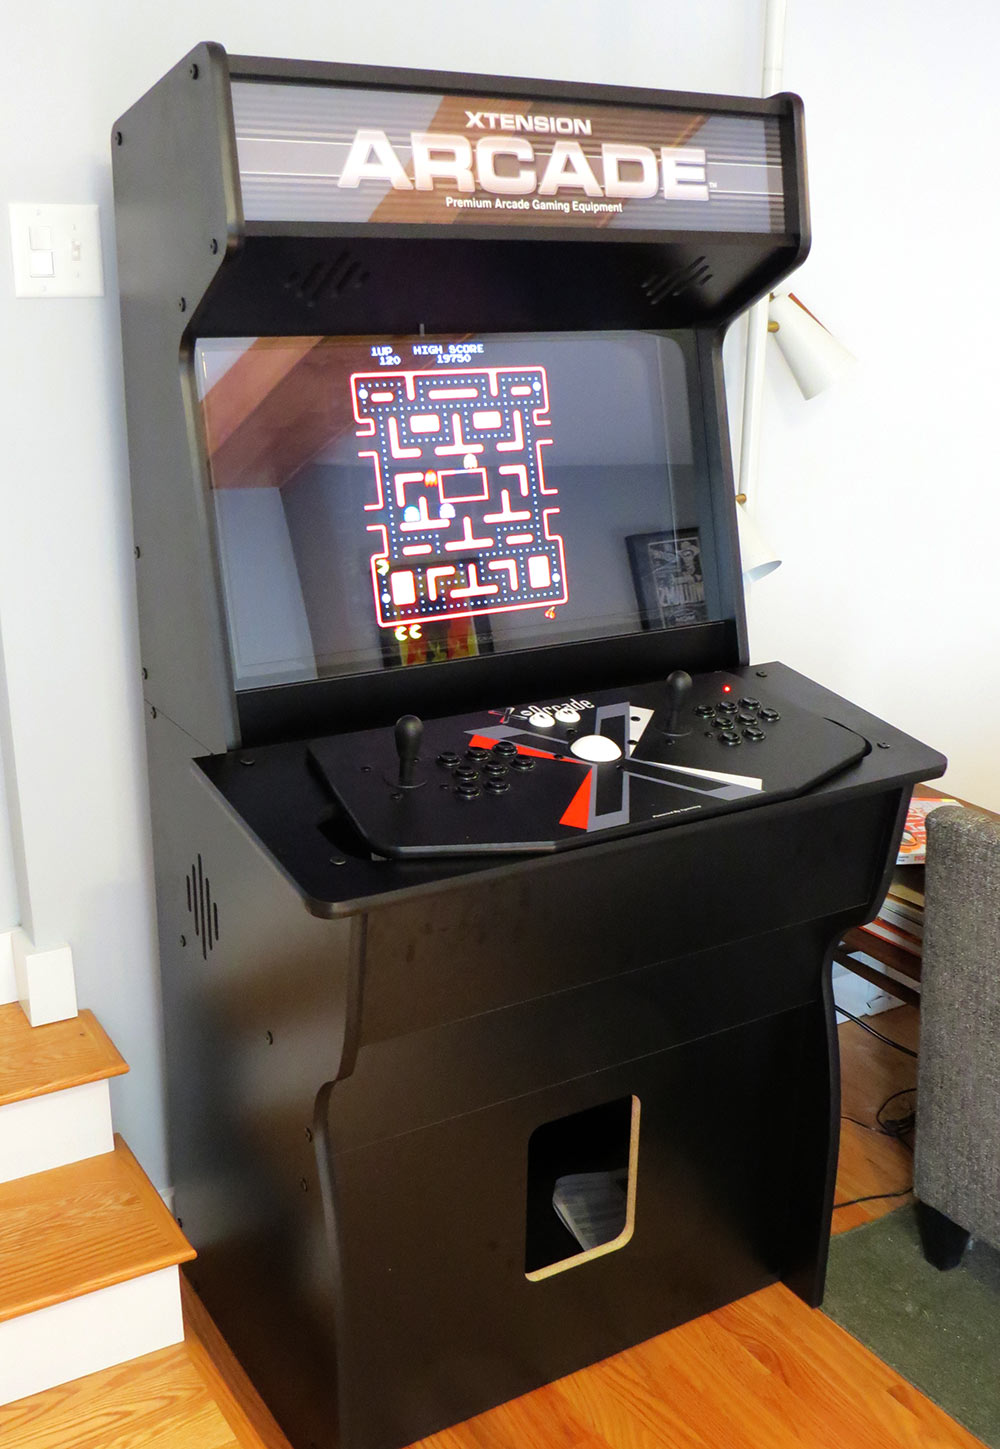
The completed cabinet, before custom artwork or coin door.
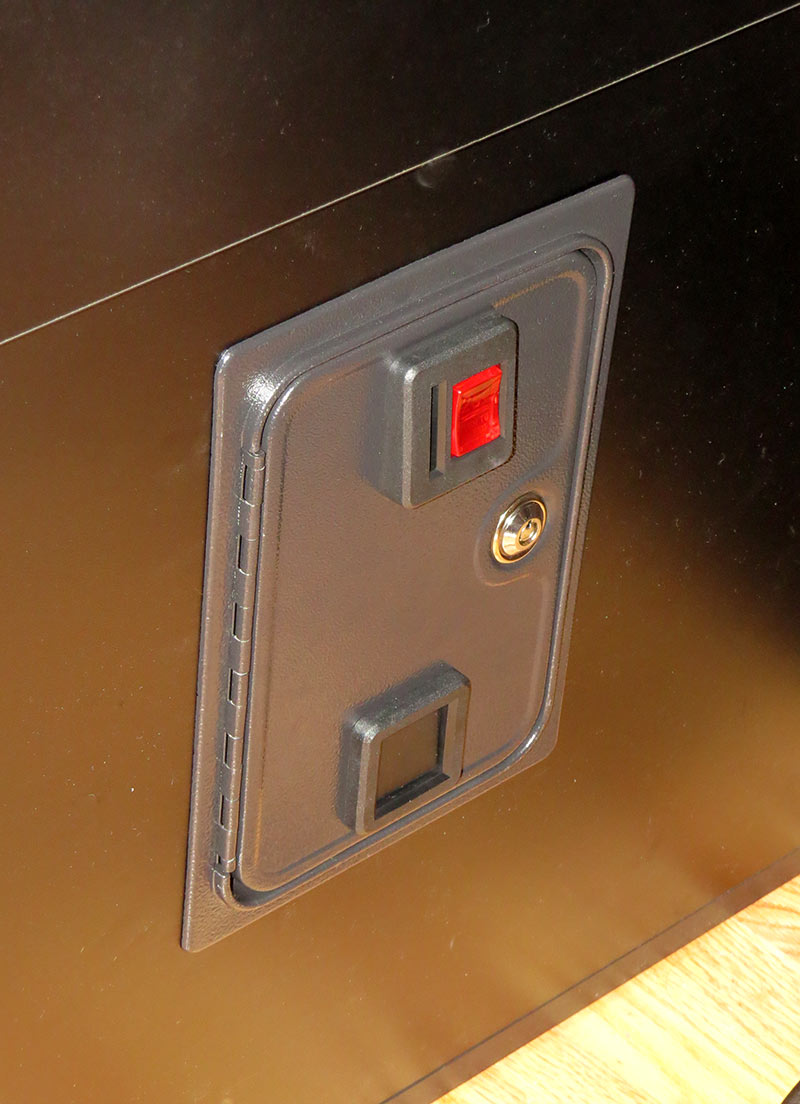
X-Arcade coin door
The cabinet went together super easily with two people and we were up and running in just a couple of hours start to finish. They also sell custom marquee art and custom art for the side panels and keyboard door. You can get that either as large sheets of vinyl that you apply, or if you're really brave, they'll do permanent artwork laminated to the cabinet before they ship it. Also, at the time we ordered ours, they sold vinyl artwork for the X-Arcade Tankstick as well, but just as Natalie finished her design, they pulled it from the site.
We also got a metal coin door from X-Arcade. It went in really easily and definitely completes the package. I gather that if I was sufficiently motivated I could use the coin accepter to actually feed quarters to the Raspberry Pi, but I'm really, really not that motivated...
I do have to mention that Natalie also hacked up a great stool, which you can see at the end of the article. Some time back, we bought a cute formica kitchen table which came with these completely non-matching chairs. They're low, like 1970s swiveling dining room chairs. We call them Knight Rider chairs because they look like they belong in front of a computer terminal in the back of the semi where nerds work on KITT. Anyway, we have three of these scattered around the house. A couple of months ago we also got a pair of bar stools at an antique store for $22. One had pretty grawnchy bearings, but we figured we could either spray 'em 'til they go, or just add a bolt to secure it in place. The other one was pretty much rusted solid from sitting around outside. Natalie did crazy work to the bearings and got both of them spinning perfectly. The legs shined right up with Simichrome. We decided to take the seat from one of the Knight Rider chairs and bolt it on in place of the stool cushion, and it works awesome and is totally comfortable for long stretches.
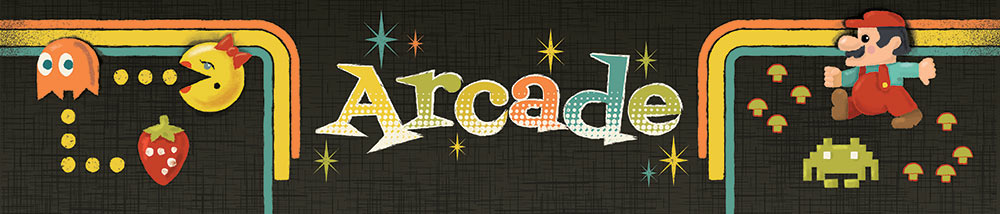
Final artwork for the marquee
While Chris has a lot to say about the technical aspects of the cabinet, I wanted to talk a little bit about the inspiration for the artwork. As he mentioned, our living room has been decorated with a mid-century theme, so I was quite worried about how this very 1980s cabinet would look. I hated the graphics that came with the X-arcade Tankstick and the marquee that came with the cabinet. Fortunately Rec Room masters will print vinyl decals for the joystick and side panels and acrylic for the marquee with your custom graphics.
After going back and forth on a number of different ideas, I decided that I wanted my design to contain graphics from classic arcade games, but with the color palette, fonts and general style of mid-century illustration.
I created my initial design in Adobe Illustrator and then brought it into Photoshop to add texture and shading.
We only got a replacement marquee and vinyl for the joystick, and we are pretty happy with the way it came out. The printing quality is fantastic and the colors were exactly as I had envisioned them. We think having full side-panel art would probably make it stick out too much in the room it's in, but we're still toying with the idea of adding some old paneling to the side to make it look more mid-century, or Atari 2600-like.
Rec Room Masters stopped selling the vinyl artwork for the Tankstick like a day or two before I was set to order it. I contacted the company and they were nice enough to allow me to still order it from them. Since it is a discontinued product, they were nice enough to send me a backup decal, in case I messed up the application of the first one. Fortunatly the decal was extremely easy to apply so I still have a backup for future use.

Final artwork for the controller
Hardware/Software critiques:
Tried, tested and approved
TV:
I have to say that had I known ahead of time what the cabinet was going to be, there might have been a bit more thought about the parts that went into it. For instance, because I got a 30" TV, we had to get the larger cabinet, which is pretty wide. I'm sure a 27" TV would have been just fine, and would have allowed us to cut like 6" off the width of the enclosure. Aside from that, I don't have much to say. I just went to Best Buy and bought the 3rd cheapest TV. In this case, it's an Insignia (just got up and looked).
Platform:
I knew the limitations of using a Raspberry Pi going into this project. I decided the trade-off in power was worth it for the cheapness of the thing, and convenience of just having it turn on and off with the TV. There's some MAME weirdness that I don't see on my regular Linux machine, such as the need to use samples for some games, but overall I got exactly what I expected out of it. It emulates the classic games I wanted really well, and consoles up to about the PS1. There are some games that are just going to be better sitting on the couch with analog controllers or d-pad in your hand anyway.
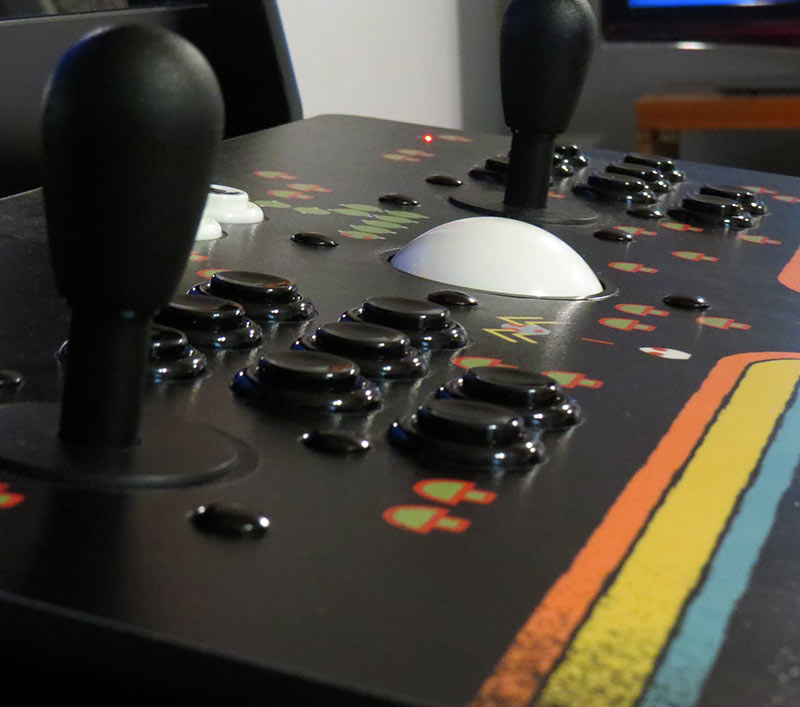
X-Arcade Tankstick:
This thing worked out really well. It's extremely solid and feels exactly like you're playing at the arcade. It uses all commercial parts and they're very reliable and replaceable. The only thing that might have pushed me toward Rec Room Masters' suggested "Xtension" controller is that the Xtension has explicit buttons for emulator functions like "Coin" and "Exit" and "Pause". I have mapped most of these functions to the flipper controls on the X-Arcade, but it'd be a lot more intuitive for people to just pick up rather than have to tell guests "Ok, this flipper adds a coin, that one quits, but /only/ in MAME, blah blah", etc. Rec Room Masters does sell custom graphics for the Xtension controller, so that's another point in its favor if you care about that sort of thing. The Xtension is a lot more expensive, and I think it lacks the Flipper buttons on the side for pinball games that we don't really have any of. At the end of the day, I'm very happy with the X-Arcade, it couldn't perform better and the layout works really well for two players.
Cabinet:
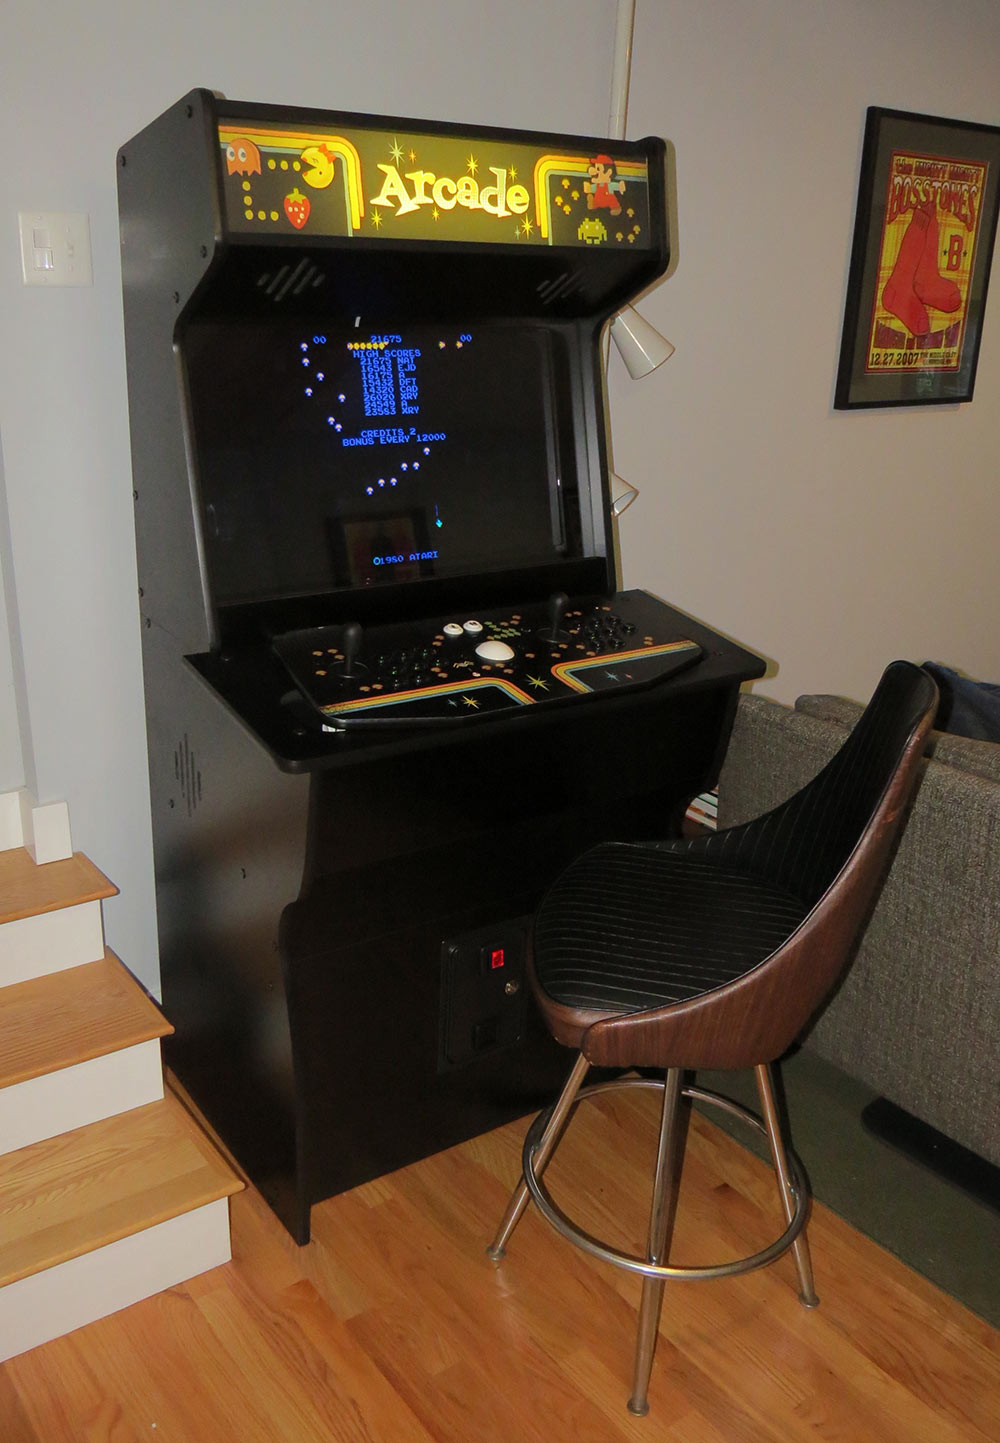
The finished cabinet with new artwork
The cabinet itself is well built, easy to assemble, and hasn't given us any hassle at all. The back is open for easy access and airflow, and they have nice touches like the grilles to cover the speaker holes in the marquee area (which we haven't installed yet). I will say that the only obvious way to open the keyboard drawer is to jam your hand through the hole around the game controller and push it open from the inside. We may or may not add a knob to the front of that door to make this go away. Also, while the fluorescent light they ship for the marquee is definitely adequate, we may swap in a "big $7 balled up string of LED lights from Amazon" instead, just to get edge-to-edge coverage. Or we may not. Honestly we'll only ever have the marquee lit up like twice a year when guests are playing with us.