Sewing Butterick Pattern 6453
One of my goals for this summer was to use up some the sewing patterns and fabric I have in my stash. I wanted to start with something simple so for my first project I decided to sew Butterick pattern B6453. This pattern is one of the "Patterns by Gertie" from Gretchen Hirsch. That pattern line has the retro look that I love and for the most part they are fairly easy and straight forward to sew. This pattern has thin, adjustable straps and a very full gathered skirt with pockets.

Butterick pattern B6453
Originally I planned to use some cherry print fabric from my stash, but I had measured incorrectly and didn't have quite enough. Instead I decided on a rose and polka dot border print purchased a few years ago. This fabric, also by Gertie, worked perfectly for this pattern.
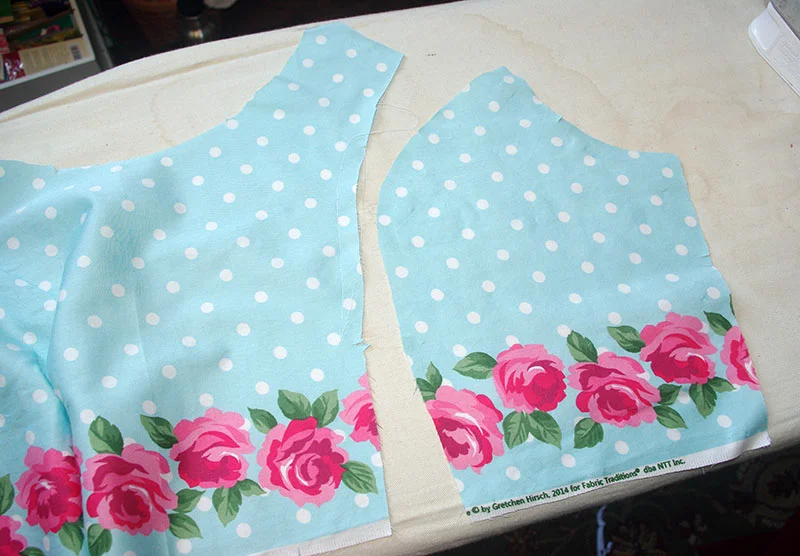
Working with a border print is something that I had been wanting to try and is a bit different than working with a regular print. Mainly because the pattern pieces are positioned just right on the fabric. This particular fabric actually has two border sections. I used the wider bottom border for the skirt portion of the dress and the thinner border I positioned along the bottom of the bodice. The directions do have pretty clear diagrams on how to lay out your pieces on a border print for the skirt portion, but it did not figure in the smaller border so I had to figure out the bodice portion on my own. I also had to cut the pattern so that the roses would line up when stitched, which took some careful positioning. The end result wasn't perfect, but they did line up fairly well and I was happy with my first attempt at this.

The skirt portion of the pattern lined up on the border print.

The bodice pieces lined up on the smaller border print.
This pattern featured a princess seamed bodice which I think are really interesting to sew. It's almost like a puzzle or sculpture sewing two flat pieces of fabric together to make a rounded shape. I also find a princess seam can be easier to fit than darts, which can sometimes be positioned in the wrong spot or get too pointy.
The princess seamed bodice pieces

A pinned princess seam, ready to be stitched.
For the straight seams of the dress, I decided to do a turned, stitched seam and a pinked seam for any of the curved seams. The turned, stitched seams take a bit longer, but do look nice and prevent the fabric from fraying.

One of the turned and stitched seams

One of the pinked seams
From start to finish it took me a little over 2 days to complete. The pattern was easy to use, with very clear directions. I made very few adjustments to the pattern but I did have to change the waistline a bit and I made the straps wider and non-adjustable. The only only issue with the fit of the dress is that the back of the bodice gaps at the top. I did make a muslin first, which seemed to fit okay, but that changed when sewed the final version. If I had more of this fabric I would just remake the bodice, but it is no longer in print. I may experiment with altering the dress at some point, bit I'm not really comfortable doing that quite yet, so I'll probably just leave it as is for now. If were to make this dress again I think making the overall bodice a bit smaller would probably help. Overall, I'm very happy with the way it turned out.
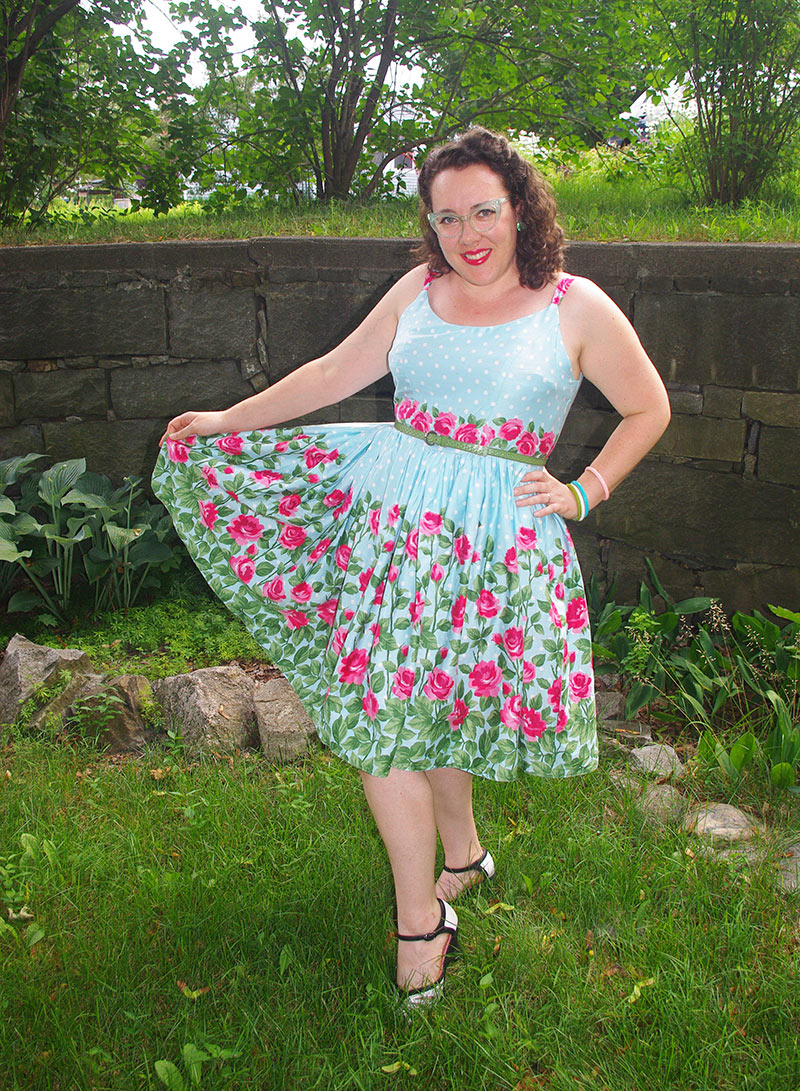
The final result.